
Black & Decker Coffee Maker Cleaning Instructions: A Comprehensive Guide
Maintaining your Black & Decker coffee maker ensures optimal performance and longevity. This guide details essential cleaning procedures, utilizing products like Urn cleaning powder and Scotch-Brite pads for a pristine interior.
Welcome to a comprehensive guide dedicated to maintaining your Black & Decker coffee maker! Ensuring your appliance remains clean is paramount for consistently brewing delicious coffee and extending its lifespan. This introduction sets the stage for understanding the importance of regular upkeep, covering everything from daily routines to deep cleaning procedures.
Black & Decker coffee makers, as outlined in their instruction manuals, require consistent attention to detail. Proper cleaning isn’t just about taste; it’s about safety and preventing malfunctions. Understanding the main control elements and following the provided directions for setup, operation, and cleaning are crucial. This guide will supplement those instructions, offering detailed steps and troubleshooting advice. We’ll explore how to effectively use cleaning agents like Urn cleaning powder and appropriate brushes to tackle residue buildup.
Ultimately, a clean coffee maker delivers a superior coffee experience. Let’s begin!
Why Regular Cleaning is Crucial
Consistent cleaning of your Black & Decker coffee maker is far more than just aesthetic; it’s fundamental to its performance and your health. Over time, mineral deposits from water accumulate, impacting brewing temperature and coffee flavor. These deposits, if left unchecked, can lead to inefficient operation and even appliance failure.
Furthermore, a dirty coffee maker harbors bacteria and mold, potentially contaminating your beverage. Regular cleaning eliminates these harmful microorganisms, ensuring a safe and enjoyable coffee experience. Utilizing appropriate cleaning solutions, like those recommended in the manuals – including Urn cleaning powder – effectively removes these build-ups.
Neglecting cleaning also affects the coffee’s taste, resulting in a bitter or stale flavor profile. A clean machine extracts the full aroma and richness of your coffee grounds. Prioritizing regular maintenance safeguards your investment and guarantees a consistently delicious cup, preventing costly repairs or replacements down the line.
Safety Precautions Before Cleaning
Prioritizing safety is paramount when cleaning your Black & Decker coffee maker. Always begin by disconnecting the appliance from the power outlet to prevent electrical shock. Allow the coffee maker to cool completely before handling any components, especially the carafe and hotplate, to avoid burns.
Never immerse the coffee maker base in water or any other liquid. This could cause a dangerous electrical hazard. When using cleaning solutions, ensure adequate ventilation in the area. Avoid mixing different cleaning agents, as this can create harmful fumes.
Exercise caution when handling the steam nozzle, if applicable, as it may still retain heat. Refer to your model’s manual for specific safety guidelines. When disassembling parts, handle them carefully to prevent breakage. Always rinse thoroughly after using any cleaning product to remove residue, ensuring a safe and flavorful brew.
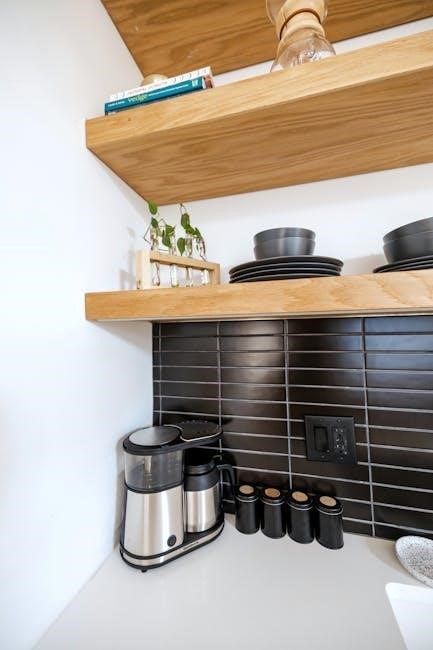
Daily Cleaning Procedures
Consistent daily upkeep is key! Rinse the carafe, wash the filter basket, and empty/rinse the water reservoir after each brewing cycle for optimal freshness.
Cleaning the Carafe
The carafe requires regular attention to prevent coffee oils and residue buildup. After each use, promptly remove the carafe from the hotplate and discard any remaining coffee grounds from the filter basket. Rinse the carafe thoroughly with warm, soapy water. For stubborn stains, a gentle abrasive cleaner, or even a paste made of baking soda and water, can be effective.
Avoid using harsh scouring pads, as these can scratch the glass. Pay particular attention to the inside of the carafe, ensuring all coffee residue is removed. Rinse the carafe completely to eliminate any soap residue. Some models may have a warming plate residue; address this with a damp cloth. Allow the carafe to air dry completely before reassembling the coffee maker. Regular cleaning prevents bitter tastes and ensures your coffee always tastes its best. Consider a deeper clean weekly, especially if you brew frequently.
Washing the Filter Basket
The filter basket accumulates coffee grounds and oils, necessitating frequent cleaning. After each brewing cycle, remove the filter basket and discard the used coffee grounds. Rinse the basket thoroughly under warm running water to remove any remaining particles. For a more thorough clean, wash the filter basket with warm, soapy water. Ensure you reach all crevices to eliminate built-up residue.
If you use a reusable filter, it’s crucial to clean it meticulously after each use. Periodically, a deeper cleaning with a mild descaling solution can help remove mineral deposits and coffee oils that accumulate over time. Avoid abrasive cleaners that could damage the filter. Rinse the basket completely to remove all traces of soap or descaling solution. Allow the filter basket to air dry before reassembling your Black & Decker coffee maker. A clean filter basket contributes to a better-tasting brew.
Rinsing the Water Reservoir
Regularly rinsing the water reservoir prevents mineral buildup and ensures fresh-tasting coffee. After each use, empty any remaining water from the reservoir. Rinse the reservoir thoroughly with fresh, cool water. This simple step helps to prevent the accumulation of scale and keeps the reservoir hygienic.
For a more comprehensive cleaning, periodically wash the reservoir with mild dish soap and warm water. Ensure all soap residue is completely rinsed away before refilling. To initiate a steam circuit rinsing cycle, place a container under the steam nozzle and press the button for approximately three seconds; this will automatically stop after a short period. This helps flush out any lingering impurities. A clean water reservoir is vital for optimal coffee maker performance and the quality of your brewed coffee.

Descaling Your Black & Decker Coffee Maker
Descaling removes mineral deposits that impact performance. Regular descaling, using solutions like Urn cleaning powder or vinegar, maintains optimal brewing temperature and coffee flavor.
Understanding Mineral Buildup
Mineral buildup, primarily calcium and lime scale, is a common issue in coffee makers, especially in areas with hard water. This occurs because water contains dissolved minerals that are left behind when the water is heated and evaporated during the brewing process. Over time, these minerals accumulate inside the water reservoir, heating element, and spray head, forming a hard, chalky deposit.
This buildup can significantly impact your coffee maker’s performance. It reduces the efficiency of the heating element, leading to slower brewing times and lower water temperatures. Consequently, your coffee may not be brewed at the optimal temperature, resulting in a weaker, less flavorful cup. Furthermore, mineral deposits can clog the internal components, potentially causing the coffee maker to malfunction or even stop working altogether.
Regular descaling is crucial to prevent these issues and maintain the longevity of your Black & Decker coffee maker. Ignoring mineral buildup can lead to costly repairs or the need for a replacement.
Using Urn Cleaning Powder for Descaling
Urn cleaning powder is a highly effective solution for removing mineral buildup from your Black & Decker coffee maker. It’s specifically formulated to dissolve calcium and lime scale, restoring your machine’s optimal performance. Begin by emptying any remaining coffee and water from the machine. Then, dissolve the recommended amount of Urn cleaning powder (refer to the product packaging for specific instructions) in a full reservoir of cool water.
Place a clean carafe on the hotplate. Initiate a full brewing cycle, allowing the cleaning solution to circulate through the entire system. Once the cycle is complete, discard the solution and rinse the carafe thoroughly. Repeat the brewing cycle two to three times with fresh, clean water to ensure all traces of the cleaning powder are removed. This prevents any residual taste from affecting your next brew.
Always follow the Urn cleaning powder’s instructions and safety guidelines.
Alternative Descaling Solutions (Vinegar & Commercial Descalers)
While Urn cleaning powder is recommended, alternative descaling solutions like white vinegar or commercially available descalers can also be used. For vinegar, mix equal parts white vinegar and water in the reservoir. Run a full brewing cycle, then discard the solution and rinse thoroughly with two to three cycles of fresh water – crucial to eliminate the vinegar taste.
Commercial descalers offer a convenient option; always follow the manufacturer’s instructions precisely. These often come in tablet or liquid form and are designed for coffee maker descaling. Regardless of the chosen method, ensure complete rinsing after descaling. Residual descaling agents can impact the flavor of your coffee and potentially damage internal components.
Consider your machine’s warranty before using vinegar, as it may void coverage in some cases;
Descaling Procedure: Step-by-Step Instructions
Begin by emptying the carafe and removing the filter basket. Fill the water reservoir with the descaling solution – either Urn cleaning powder mixed with water, vinegar and water, or a commercial descaler, following product instructions. Place the empty carafe back on the warming plate. Initiate a full brewing cycle, allowing the solution to run completely through the system.
Once the cycle finishes, discard the descaling solution. Fill the reservoir with fresh, clean water and run at least two full brewing cycles to thoroughly rinse away any remaining descaling agent. For optimal results, repeat this rinsing process a third time. A steam circuit rinsing cycle, activated by pressing the steam button for 3 seconds, can further aid in flushing the system.
Ensure all traces of the descaling solution are removed before brewing coffee.

Deep Cleaning & Maintenance
Regular deep cleaning extends your coffee maker’s life. Focus on exterior surfaces, the spray head, and the steam nozzle (if present) for peak performance.
Cleaning the Exterior Surfaces
Maintaining a clean exterior not only enhances the appearance of your Black & Decker coffee maker but also prevents the buildup of spills and residue. Begin by ensuring the coffee maker is unplugged and completely cool to the touch – safety first! Dampen a soft cloth with warm, soapy water. Avoid abrasive cleaners, as these can scratch or damage the finish.
Gently wipe down all exterior surfaces, including the housing, control panel, and hotplate. Pay particular attention to areas prone to spills, such as around the carafe rest and water reservoir lid. For stubborn stains or sticky residue, allow the soapy water to sit for a few minutes before wiping. Rinse the cloth thoroughly with clean water and wipe down all surfaces again to remove any soap residue.
Finally, dry the exterior with a clean, dry cloth to prevent water spots. Regular exterior cleaning, ideally after each use, will keep your coffee maker looking its best and functioning efficiently.
Cleaning the Steam Nozzle (If Applicable)
For Black & Decker coffee makers equipped with a steam nozzle, regular cleaning is vital to prevent clogs and ensure optimal steam performance. After each use, or at least weekly, run a steam cycle with water only. Place a container under the nozzle and press the steam button for approximately three seconds to initiate a rinsing cycle – this automatically stops after a short duration.
This flushing action helps remove any milk residue or mineral buildup. If the nozzle becomes clogged, gently use a small pin or toothpick to dislodge any obstructions. Avoid using metal objects that could damage the nozzle. You can also soak a cloth in warm, soapy water and carefully wipe the exterior of the nozzle.
Ensure all soap residue is removed by rinsing with clean water. Consistent cleaning prevents buildup and maintains the steam nozzle’s functionality, allowing you to enjoy perfectly steamed beverages.
Cleaning the Spray Head
The spray head, responsible for evenly saturating coffee grounds, requires periodic cleaning to maintain optimal brewing quality. Mineral deposits and coffee oils can accumulate, leading to uneven extraction and potentially clogging the spray head’s tiny holes. To clean, carefully detach the spray head – consult your model’s manual for specific instructions, as designs vary.
Once removed, soak the spray head in a solution of warm water and descaling solution (vinegar or a commercial descaler can be used). Allow it to soak for at least 30 minutes to loosen any buildup. Use a small brush, like a toothbrush, to gently scrub away remaining residue, paying close attention to the spray holes;
Rinse thoroughly with clean water to remove all traces of the cleaning solution. Reattach the spray head securely before resuming brewing. Regular cleaning ensures consistent coffee flavor and prevents potential damage to the coffee maker.
Troubleshooting Cleaning Issues
Persistent stains or mineral deposits may require repeated descaling or specialized cleaning tools. Preventative measures, like filtered water, minimize cleaning frequency and maintain performance.
Dealing with Stubborn Stains
Addressing persistent coffee stains within your Black & Decker coffee maker requires a focused approach. While regular cleaning prevents buildup, some stains may linger, particularly in the carafe and filter basket. For the carafe, a paste made of baking soda and water can be effective; apply it to the stained areas, let it sit for 15-20 minutes, and then scrub gently with a non-abrasive sponge.
For the filter basket, soaking it in a solution of warm water and dish soap overnight can loosen stubborn residue. If stains persist, consider using a Scotch-Brite pad, but exercise caution to avoid scratching the surface. Avoid harsh chemicals or abrasive cleaners, as these can damage the coffee maker’s components. Remember to thoroughly rinse all parts with clean water after cleaning to remove any residual cleaning agents before reuse. Consistent effort and prompt attention to stains will keep your coffee maker looking and functioning its best.
Addressing Mineral Deposits That Won’t Dissolve
Occasionally, descaling solutions may struggle to fully eliminate stubborn mineral deposits within your Black & Decker coffee maker. If this occurs, repeat the descaling process, potentially increasing the concentration of the descaling solution slightly – always adhering to the manufacturer’s guidelines. For particularly resilient buildup, a longer soaking period can be beneficial; allow the solution to circulate through the system for several hours, or even overnight, before rinsing.
If vinegar is used, consider running multiple cycles with fresh water afterward to neutralize the acidity. In extreme cases, carefully inspect the spray head and water reservoir for visible deposits and manually remove them with a soft brush or cloth. Avoid using metal tools that could cause damage. Consistent preventative descaling, as outlined in the maintenance schedule, is the most effective strategy to avoid these challenging situations and maintain optimal performance.
Preventative Measures to Reduce Cleaning Frequency
Proactive habits significantly minimize the need for intensive Black & Decker coffee maker cleaning. Utilizing filtered water consistently is paramount, as it drastically reduces mineral buildup compared to tap water; Regularly emptying and rinsing the carafe and filter basket after each use prevents coffee oil and residue from accumulating and becoming difficult to remove.

Avoid overfilling the water reservoir, as spills can lead to mineral deposits on exterior surfaces. Periodically wiping down the exterior with a damp cloth maintains its appearance and prevents grime buildup; Following a consistent descaling schedule – typically every 1-3 months, depending on water hardness – is crucial. Employing medium ground coffee, suitable for Italian/Moka type coffee makers, also helps prevent clogging and ensures smoother operation, extending cleaning intervals.
Specific Black & Decker Model Considerations
Cleaning varies by model; programmable and single-serve units may have unique components. Refer to your specific model’s manual for tailored instructions and optimal care.
Cleaning Instructions for Programmable Models
Programmable Black & Decker coffee makers often include additional features requiring specific cleaning attention. Beyond the standard daily procedures – carafe washing, filter basket rinsing, and water reservoir cleaning – focus on the programmable clock and timer settings. Ensure these components are free from coffee splatters or residue, as they can interfere with functionality.
When descaling, thoroughly flush the system after using vinegar or a commercial descaler. Programmable models may benefit from an extra rinse cycle to eliminate any lingering taste or odor. Pay close attention to the steam nozzle (if equipped) and ensure it’s clear of mineral buildup. Regularly inspect the spray head for blockages, as this impacts brewing quality.
For models with automatic shut-off features, verify the sensor is clean and unobstructed. A dirty sensor can cause inaccurate timing. Always consult your model’s manual for specific cleaning recommendations, as features and designs vary. Consistent cleaning extends the lifespan and maintains the performance of your programmable coffee maker.
Cleaning Instructions for Single-Serve Models
Black & Decker single-serve coffee makers demand focused cleaning due to their unique brewing mechanisms. Daily, remove and wash the K-Cup holder or reusable filter basket thoroughly, eliminating any coffee grounds or residue. Rinse the water reservoir diligently, preventing mineral buildup that impacts flavor and performance.
Descaling is crucial; use Urn cleaning powder or a vinegar solution, following the manufacturer’s instructions precisely. Pay special attention to the needle or piercing mechanism that punctures the K-Cup – ensure it’s clear of obstructions. A clogged needle hinders water flow and affects brew quality. Regularly inspect and clean the exit nozzle, removing any coffee splatters.
For models with removable drip trays, empty and wash them frequently. Consistent cleaning prevents staining and bacterial growth. Refer to your specific model’s manual for detailed instructions, as designs vary. Proper maintenance ensures optimal brewing and extends the life of your single-serve machine.
Resources for Finding Your Model’s Manual
Locating your Black & Decker coffee maker’s specific manual is vital for tailored cleaning instructions. The official Black & Decker website is the primary resource; navigate to their support section and utilize the model number search function. Many manuals are available for download in PDF format, offering detailed diagrams and troubleshooting tips.
If the official website proves unhelpful, explore third-party manual databases like ManualsLib or similar online repositories. These sites often host user-submitted manuals for a wide range of appliances. Remember to verify the manual’s compatibility with your exact model number before relying on its instructions.
Retailers where you purchased the coffee maker may also offer downloadable manuals on their websites. Additionally, a general web search using your model number and “manual” keywords can yield relevant results. Having the correct manual ensures safe and effective cleaning practices, maximizing your coffee maker’s lifespan.