
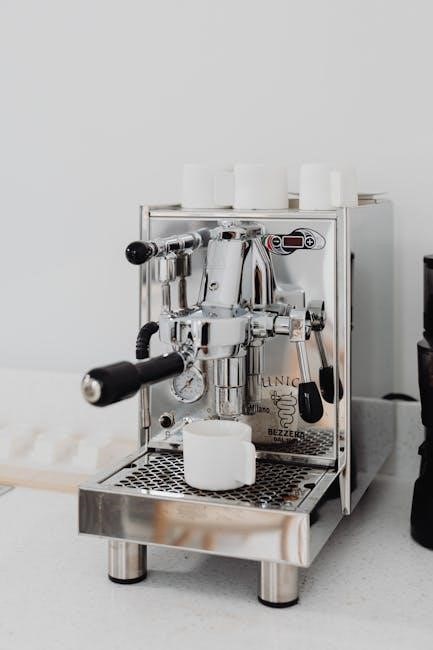
Understanding Your Old Krups Espresso Machine
Navigating older Krups models often requires accessing manuals via QR codes or the Krups website (www.krups.com). These resources detail usage and maintenance,
especially concerning descaling, which impacts warranty validity. Older machines, like the Cafe Voyager, offer instructions for brewing espresso, ristretto, and lungo.
Identifying Your Model
Pinpointing your specific Krups espresso machine model is the crucial first step for accessing relevant instructions and support. Older Krups machines, such as the XP-4000 and Cafe Voyager, require knowing the exact model number to locate the correct user manual.
Often, the model number is found on a sticker located on the underside of the machine, or near the water reservoir. It might also be present on the original packaging if you still have it. The manuals available online, including those in PDF format, are specific to each model.
Without the correct model identification, you risk using incorrect instructions, potentially damaging your machine or not achieving optimal brewing results. Krups provides resources, including QR codes, to help direct you to the appropriate manual for your particular espresso machine.
Dating Your Krups Machine
Determining the age of your Krups espresso machine can be challenging, as precise manufacturing dates aren’t always readily available. However, knowing the approximate age can be helpful when searching for compatible replacement parts or understanding potential maintenance requirements.
While a serial number might exist, it doesn’t always directly translate to a manufacturing date. Examining the style and features of the machine can offer clues; older models generally have simpler controls and fewer automated functions compared to newer ones.
Searching online forums and communities dedicated to Krups espresso machines can sometimes yield information about production runs and approximate dates for specific models. Accessing older user manuals, often found via the Krups website or through online archives, may also contain subtle indicators of the machine’s era.

Initial Setup & Safety
Before first use, thoroughly read the safety instructions booklet provided with your Krups machine. Detailed guidance is also available by scanning QR codes or visiting krups.com.
Reading the Safety Instructions
Prioritizing safety is paramount when operating any Krups espresso machine, especially older models. The provided safety instructions booklet contains crucial information regarding proper usage, potential hazards, and preventative measures to ensure your well-being and the longevity of the appliance.
Carefully review all warnings and cautions before the initial setup and each subsequent use. Pay close attention to guidelines concerning electrical safety, hot surfaces, and steam pressure.
Understanding these instructions will help you avoid accidental burns, electrical shocks, or damage to the machine.
The manual emphasizes the importance of regular descaling to maintain optimal performance and prevent malfunctions that could compromise safety.
Familiarize yourself with the machine’s components and their functions as described in the booklet.
Remember, neglecting the safety instructions can void the warranty and potentially lead to hazardous situations.
First-Time Use: Flushing the System
Before brewing your first cup with your older Krups espresso machine, a thorough flushing of the system is essential. This process removes any residual manufacturing debris or impurities that may affect the taste of your espresso and ensures optimal performance.
Fill the water reservoir with fresh, clean water to the maximum level.
Without adding any coffee grounds to the filter holder, initiate a brewing cycle as if you were making espresso.
Allow the machine to run through a full cycle, discarding the water that is dispensed.
Repeat this flushing process at least two to three times, or until the water runs clear and free of any particles.
This initial flush prepares the machine for consistent, flavorful espresso brewing and helps prolong its lifespan by removing potential contaminants.
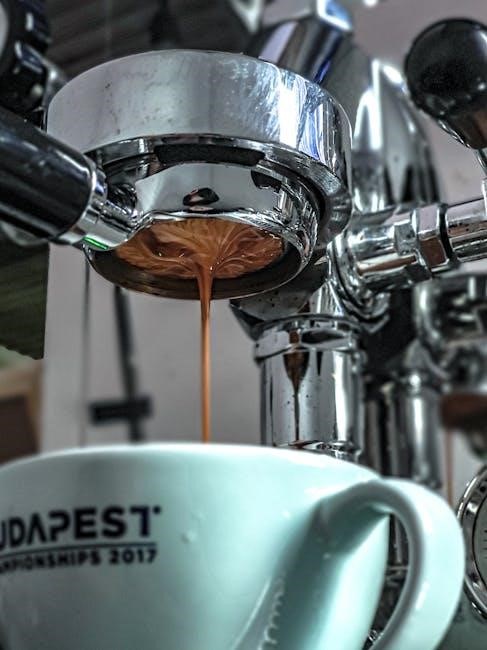
Brewing Espresso
Older Krups machines allow brewing espresso, ristretto, and lungo. Use the provided measuring spoon – one for 50ml, two for 100ml – and avoid overfilling the filter holder.
Grinding the Coffee Beans
Achieving optimal espresso quality with your older Krups machine hinges on the correct coffee bean grind. While specific guidance isn’t detailed in the provided snippets, understanding general espresso principles is crucial. A consistent grind is paramount; inconsistent particles lead to uneven extraction.
Generally, espresso requires a fine grind – finer than drip coffee, but not as powdery as Turkish coffee. The ideal grind size will depend on your specific Krups model and the type of beans you’re using. Experimentation is key! Start with a fine setting and adjust based on the brew time.
If the espresso brews too quickly (under 25 seconds), the grind is likely too coarse. Conversely, if it brews too slowly (over 30 seconds), the grind is too fine. Freshly grinding your beans immediately before brewing is highly recommended for maximum flavor and aroma. Pre-ground coffee loses its volatile compounds quickly, resulting in a less vibrant espresso.
Filling the Filter Holder
Properly filling the filter holder – or portafilter – is essential for a balanced espresso extraction with your vintage Krups machine. Avoid overfilling; the provided text explicitly states, “Do not fill your filter holder to the brim.” This prevents puck compression issues and potential machine malfunctions.
Krups recommends using the provided measuring spoon for accurate dosing. One spoon is sufficient for a single 50ml cup, while two spoons are recommended for a double 50ml cup. This ensures the correct coffee-to-water ratio.
Level the coffee grounds evenly within the filter basket after dispensing from the spoon. This promotes uniform water flow during brewing. Gently tap the portafilter on a counter to settle the grounds, but avoid excessive force. A level and appropriately dosed filter holder is the foundation for a quality espresso shot, maximizing flavor and crema.
Tamping the Coffee Grounds
Although the provided text doesn’t directly detail tamping, it’s a crucial step following filter holder filling for optimal espresso extraction with older Krups machines. Tamping compresses the coffee grounds into a firm, even puck, creating resistance for the water to flow through.
Use a tamper that fits the diameter of your portafilter basket. Apply approximately 30 pounds of pressure, ensuring a level and consistent tamp. An uneven tamp leads to channeling – where water finds the path of least resistance – resulting in weak or bitter espresso.
After tamping, gently polish the surface of the puck by twisting the tamper slightly. This further seals the grounds. A well-tamped puck is vital for achieving proper extraction, maximizing flavor, and producing a rich, flavorful espresso shot from your vintage Krups espresso machine.
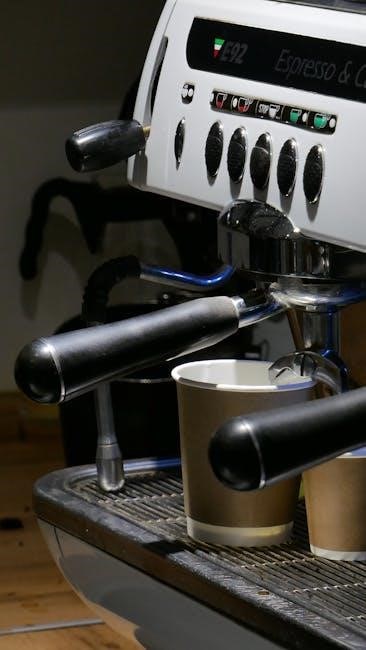
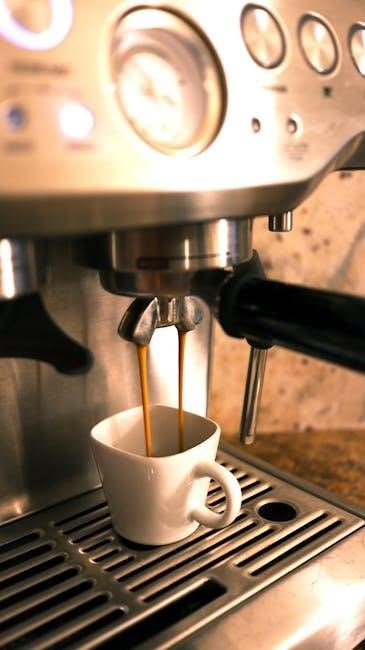
Brewing Single & Double Shots
Older Krups machines, as indicated in available manuals, allow for brewing various coffee types including espresso, ristretto, and lungo. When preparing espresso, the amount of coffee used dictates whether you’re brewing a single or double shot.
For a single 50ml cup, the instructions suggest using one measuring spoon of coffee grounds. Conversely, for a double shot (approximately 2 x 50ml cups), utilize two measuring spoons. Ensure the grounds are evenly distributed and tamped firmly within the filter holder, as previously described.
Secure the portafilter into the machine and initiate the brewing process. Monitor the extraction; a properly brewed espresso should exhibit a rich, reddish-brown crema. Adjust grind size and tamping pressure if the extraction is too fast or slow to achieve optimal results with your Krups machine.

Milk Frothing & Cappuccino
Older Krups machines enable crafting cappuccinos, lattes, and macchiatos. Prepare milk for frothing and utilize the steam wand to create a velvety texture for delightful coffee beverages.
Preparing Milk for Frothing
Achieving perfectly frothed milk with your older Krups espresso machine begins with proper preparation. Start with cold milk – whole milk generally produces the richest, most stable foam, but 2% or even non-dairy alternatives can be used with varying results; Ensure the milk is fresh for optimal texture and flavor.

Fill your frothing pitcher to approximately one-third full; this allows ample space for the milk to expand as it’s aerated. Avoid overfilling, as this can lead to spills and difficulty creating the desired microfoam.
Purge the steam wand briefly to remove any condensation. Submerge the wand tip just below the surface of the milk and begin introducing air. Listen for a gentle hissing sound – this indicates you’re incorporating air to create the foam. Once the volume increases by about 50%, lower the wand slightly to create a vortex, warming the milk and breaking up larger bubbles into a smooth, velvety microfoam.
Remember to monitor the milk temperature; avoid overheating, as this can scald the milk and affect its taste.
Using the Steam Wand
Mastering the steam wand on your vintage Krups machine is key to crafting café-quality milk-based beverages. Before each use, purge the wand by briefly opening the steam valve to release any condensed water – this ensures dry steam for optimal frothing.
Submerge the wand tip just below the surface of the cold milk, angling it slightly to create a whirlpool effect. Initially, introduce air by keeping the tip near the surface, listening for a gentle hissing sound. This creates the foam.
Once you’ve achieved the desired foam volume (roughly a 50% increase), lower the wand deeper into the milk to heat it without adding more air. Maintain the whirlpool motion, ensuring even heating.
Monitor the milk temperature carefully; aim for around 140-155°F (60-68°C). After steaming, immediately wipe down the wand with a damp cloth and purge it again to prevent milk buildup.
Creating Cappuccino & Latte
Leveraging your expertly frothed milk, crafting classic cappuccinos and lattes with your Krups machine is straightforward. A traditional cappuccino consists of equal parts espresso, steamed milk, and foamed milk – layering is key for visual appeal. Start with a shot of espresso in your cup, then gently pour in the heated milk, holding back the foam with a spoon.
Finally, spoon the thick, velvety foam over the top, creating a distinct layered effect. For a latte, use a larger cup and a greater proportion of steamed milk to espresso (typically a 1:3 ratio), with a thin layer of foam on top.
Experiment with ratios to find your preferred balance. Remember, the quality of both the espresso and the milk texture significantly impacts the final result. Enjoy your homemade coffeehouse creations!
Cleaning & Maintenance
Regular cleaning is vital; descaling prevents machine failure and maintains warranty validity. Daily procedures, alongside filter holder and steam wand cleaning, ensure optimal performance.
Daily Cleaning Procedures
Consistent daily cleaning is paramount for maintaining your Krups espresso machine’s longevity and ensuring the quality of your brewed coffee. After each use, immediately rinse the filter holder and portafilter thoroughly with warm water, removing all traces of coffee grounds. Wipe down the exterior of the machine with a damp cloth to prevent buildup.
Pay close attention to the drip tray, emptying and cleaning it daily to avoid overflows and maintain hygiene. The steam wand requires immediate attention after each frothing session; purge it by briefly releasing steam to clear any milk residue. Wipe the wand clean with a damp cloth.
Avoid abrasive cleaners, as they can damage the machine’s finish. Remember to never immerse the machine base in water. These simple, consistent steps will contribute significantly to the overall health and performance of your older Krups espresso machine, guaranteeing years of enjoyable coffee brewing.
Descaling Your Krups Machine
Descaling is a critical maintenance task for any Krups espresso machine, especially older models, and neglecting it can void your warranty. Mineral buildup from water significantly impacts performance and coffee taste. Refer to your machine’s manual – accessible via the Krups website or QR codes – for specific descaling instructions, as procedures can vary slightly between models.
Generally, descaling involves running a descaling solution (often a mixture of water and a descaling agent) through the machine’s brewing cycle. Follow the manual’s guidance on the solution-to-water ratio and the number of cycles to perform.
After descaling, thoroughly rinse the system by running several cycles with fresh water to remove any residual descaling solution. Regular descaling – frequency depends on water hardness – ensures optimal brewing temperature, prevents blockages, and extends the lifespan of your beloved, vintage Krups espresso machine.
Cleaning the Filter Holder & Portafilter
Maintaining a clean filter holder and portafilter is essential for consistently delicious espresso from your Krups machine. After each use, immediately remove used coffee grounds to prevent them from drying and becoming difficult to remove. Rinse both components thoroughly under warm water, ensuring no residue remains;
For a deeper clean, disassemble the portafilter (if possible, based on your model) and wash all parts with warm, soapy water. Pay close attention to the filter basket, removing any lingering coffee oils. Avoid abrasive cleaners, as they can damage the metal.
Dry all components completely before reassembling. Regularly inspect the filter basket for any blockages or damage. Do not overfill the filter holder; use the provided measuring spoon – one for a 50ml cup, two for a 100ml cup – and wipe away any excess grounds before brewing.
Cleaning the Steam Wand
Proper steam wand cleaning is crucial for hygiene and optimal milk frothing performance with your Krups espresso machine. Immediately after each use, purge the steam wand by briefly opening the steam valve to release any remaining milk. This prevents milk from drying inside the wand, which can cause blockages.
Next, wipe the steam wand thoroughly with a damp cloth to remove any visible milk residue. For stubborn milk buildup, immerse the lower portion of the wand in a container of water and briefly purge the steam again. This helps dislodge hardened milk.
Regularly disassemble the steam wand tip (if your model allows) and soak it in warm, soapy water to remove any hidden residue. Rinse thoroughly and dry before reattaching. Consistent cleaning prevents bacterial growth and ensures consistently textured milk for your cappuccinos and lattes.
Troubleshooting Common Issues
If your Krups machine won’t turn on, check the power connection. Slow brewing or weak espresso often indicates insufficient coffee or improper tamping; descaling is vital!
Machine Not Turning On
When your vintage Krups espresso machine fails to power on, a systematic approach to troubleshooting is essential. First, meticulously verify the power cord connection – ensure it’s securely plugged into both the machine and a functioning electrical outlet. Test the outlet with another device to confirm it’s delivering power.
If the outlet is working, inspect the power cord itself for any visible signs of damage, such as fraying or cuts. A damaged cord presents a safety hazard and should be replaced immediately. Some older models might have an internal fuse; consult the user manual (available via QR code or krups.com) for its location and replacement instructions.
Occasionally, the issue might stem from the machine’s internal thermal fuse, designed to protect against overheating. However, diagnosing this requires professional assistance. Before seeking repair, double-check that any safety locks or switches are correctly engaged, as some models feature these mechanisms. Remember, attempting repairs yourself could void any remaining warranty or create further complications.
Espresso Brewing Too Slowly
If your older Krups espresso machine is brewing excessively slowly, several factors could be at play. A primary culprit is often coffee grounds that are ground too finely or tamped with excessive force, creating too much resistance for the water to pass through. Experiment with a coarser grind setting and reduce the tamping pressure.
Another common issue is a buildup of mineral scale within the machine’s internal components, restricting water flow. Regular descaling, as outlined in the user manual (accessible via QR code or krups;com), is crucial for preventing this. Ensure you’re using the correct descaling solution and following the instructions precisely.
Inspect the filter holder and portafilter for any blockages or coffee residue. Thorough cleaning is essential. Finally, verify that the water reservoir is adequately filled and that the machine hasn’t been recently descaled without a proper flushing cycle afterward to remove residual descaling solution.
Weak or Watery Espresso
Producing weak or watery espresso with your older Krups machine typically indicates an insufficient amount of coffee grounds being used, or the grounds are too coarsely ground. Refer to the user manual – found via QR code or at krups.com – for recommended coffee measurements; generally, one measuring spoon is suggested for a 50ml cup, and two for a double shot.
Ensure you’re tamping the coffee grounds firmly and evenly within the filter holder. Inadequate tamping creates gaps for water to flow through, resulting in under-extraction. Conversely, over-tamping can also cause issues, but is less common with watery espresso.
Check the water temperature; if the machine isn’t reaching optimal brewing temperature, the espresso will be weak. Descaling can also indirectly improve espresso quality by ensuring efficient heating. Finally, confirm the coffee beans are fresh, as stale beans yield a weaker brew.
Steam Wand Not Working

If the steam wand on your older Krups espresso machine isn’t functioning, the first step is to ensure the machine has fully heated up. Allow sufficient time for the boiler to reach the correct temperature before attempting to use the steam function. Check the water reservoir level; insufficient water will prevent steam generation.
Next, verify that the steam wand isn’t blocked. Mineral buildup can obstruct the wand’s opening. Regularly cleaning the steam wand after each use, by purging steam through it, helps prevent this. Refer to your machine’s manual (accessible via krups.com or QR code) for specific cleaning instructions.
If the issue persists, descaling the machine is crucial, as limescale buildup can affect steam production. A blocked or faulty solenoid valve could also be the cause, potentially requiring professional repair.

Finding Manuals & Support
Krups provides manuals through their website (www.krups.com) and via QR codes on the machine. Online forums and communities offer user support and replacement parts sourcing.
Krups Website & QR Codes
Locating documentation for your vintage Krups espresso machine is often streamlined through Krups’ official website (www.krups.com). Many older models, such as the Cafe Voyager and Orchestro Expresso, direct users to scan a QR code printed on the machine itself. This code instantly links to the relevant user manual in a digital format – typically a PDF file.
The website hosts a comprehensive archive of manuals, allowing you to search by model number or keywords. These manuals are invaluable for understanding the specific features, operation, and maintenance requirements of your particular Krups machine. They detail everything from initial setup and safety precautions to brewing techniques and troubleshooting common issues.
Remember to download and save a copy of the manual for future reference, as access to online resources can change over time. Utilizing these digital resources ensures you have the necessary information to keep your classic Krups espresso machine functioning optimally for years to come.
Online User Forums & Communities
Beyond official documentation, a wealth of knowledge resides within online user forums and communities dedicated to Krups espresso machines. These platforms offer a collaborative space where owners share experiences, troubleshooting tips, and restoration advice specifically for older models.
Searching online will reveal dedicated groups where enthusiasts discuss everything from sourcing replacement parts to diagnosing obscure issues not covered in the official manuals. These communities are particularly helpful when dealing with vintage machines where original documentation may be incomplete or difficult to decipher.
Users frequently post detailed guides, photos, and videos demonstrating repair procedures and maintenance techniques. Engaging with these communities allows you to tap into the collective expertise of fellow Krups owners, potentially saving you time and money on repairs and ensuring your machine continues to deliver exceptional espresso for years to come.
Locating Replacement Parts
Sourcing replacement parts for older Krups espresso machines can present a challenge, but several avenues exist. The official Krups website may still stock components for some models, though availability diminishes with age. Checking online retailers specializing in appliance parts is a crucial next step, utilizing the model number (e.g., XP-4000, EA810770) for accurate searches.
Online user forums and communities often serve as valuable resources, with members sharing information about compatible parts from alternative manufacturers or offering salvaged components from decommissioned machines.
Be prepared to potentially explore broader appliance parts suppliers, as some Krups components may be standardized and used across multiple brands. Thorough research and careful comparison are essential to ensure compatibility before making a purchase, preserving the functionality of your classic Krups machine.